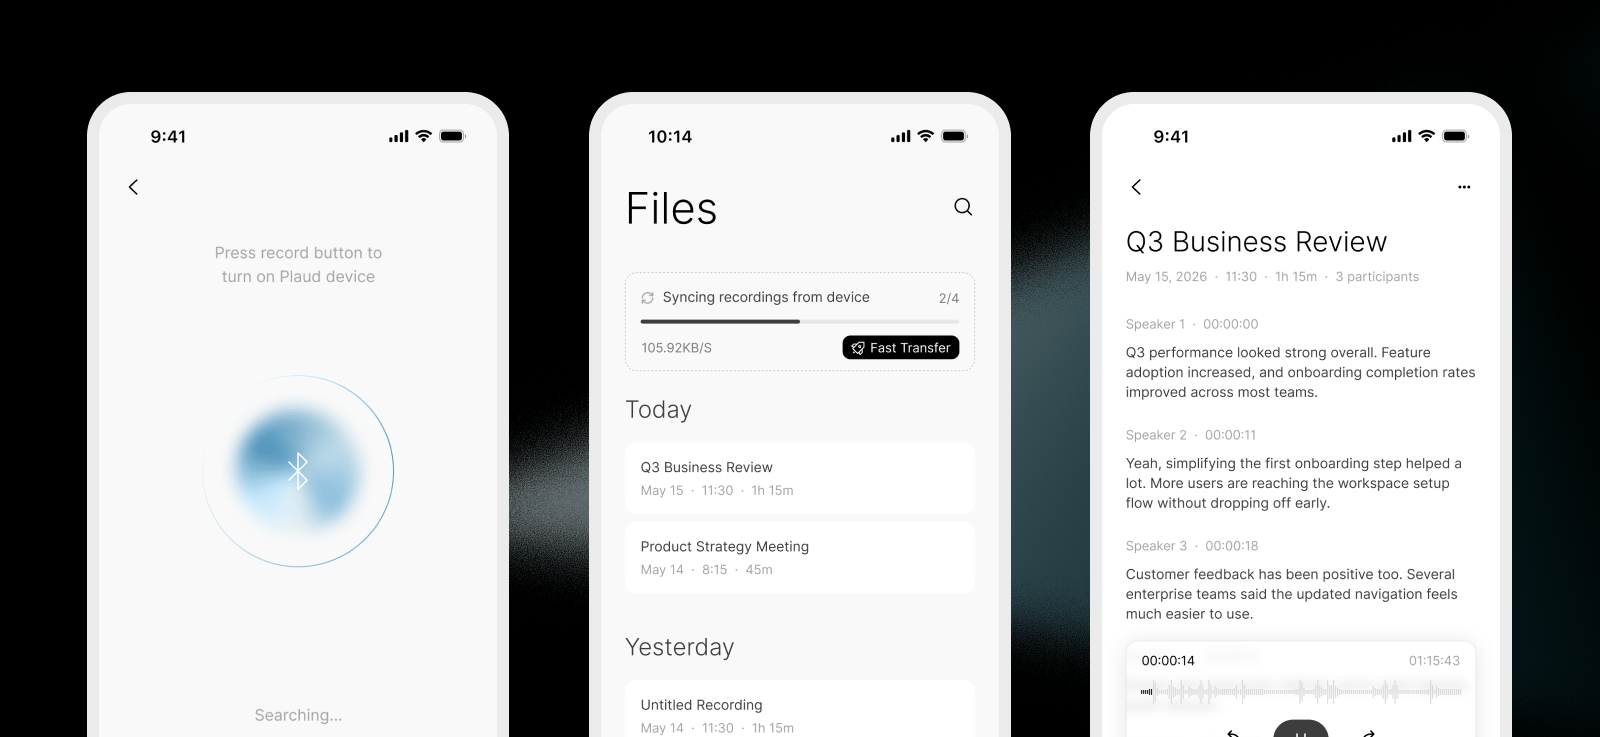
- Connects to Plaud devices
- Syncs recordings from Plaud device to mobile phone
- Uploads recordings from your users’ mobile phone to Plaud’s file storage
- Transcribes recordings with the Transcription API
Onboard to the Plaud Developer Platform
If you don’t have access to the Plaud Developer Platform, visit dev.plaud.ai and fill out the contact form. Once your request is reviewed, you’ll receive setup instructions and access to the developer console. Create an Embedded SDK Application to receive your Client ID and Secret Key.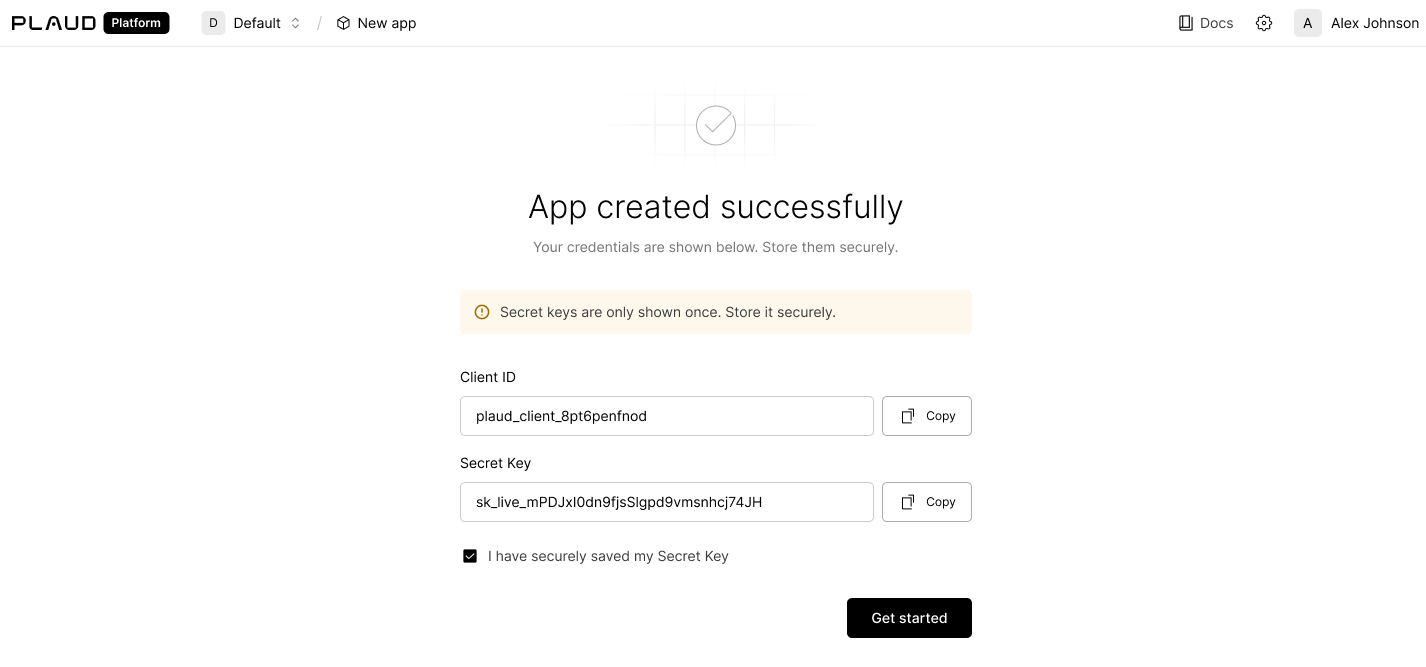
Set Up the Starter App
The Starter App is a good reference for an end-to-end implementation.If you’re a seasoned mobile developer and have an existing mobile app for your product, feel free to skip the Starter App and get started with integration with the Embedded SDK.
Prerequisites
- A Mac running macOS with Xcode 16.0+ (the SDK is built with Swift 6.0.3)
- iOS 14.0+ as deployment target
- An Apple ID for code signing onto a physical device. A free Apple ID works for local testing; TestFlight or App Store release (Step 6) requires the paid Apple Developer Program
- A physical iOS device — the SDK frameworks are
arm64-only, so iOS Simulator is not supported - A Plaud device for end-to-end testing
Clone the starter app and generate the Xcode project
Install XcodeGen (brew install xcodegen) to generate an Xcode project from the
project.yml filexcodegen generate step is required — PlaudTemplateApp.xcodeproj does not exist in source control and is built from project.yml.
You can find the GitHub repository for the starter app here.
Retrieve a user token
TheUSER_ACCESS_TOKEN is the per-user JWT your backend mints by calling POST /open/partner/users/access-token on platform-<region>.plaud.ai. See the Authorization API reference for the full exchange flow. The Secret Key stays on your backend — never ship it with the app.
client_id, secret_key, and api_key are issued per region (currently us and jp; eu and sg coming soon). Your backend must call the matching platform-<region>.plaud.ai host when minting the per-user access token — credentials issued for one region will not authenticate against another.Configure credentials
OpenPartnerConfig.xcconfig and set three values:
xcconfig
PartnerConfig.local.xcconfig alongside it with your real values — it’s gitignored and overrides the placeholders.
Then open project.yml and change bundleIdPrefix: com.plaud to your own reverse-DNS prefix (e.g., com.acme); Xcode auto-assigns your Development Team on first build.
(Optional) Apply branding
Four places control the entire visual identity:| Asset | Location | How to change |
|---|---|---|
| App name | project.yml → name: | Renaming the target updates CFBundleName via $(PRODUCT_NAME). For a distinct Home Screen label, also add CFBundleDisplayName to Info.plist. Re-run xcodegen generate after editing. |
| App icon | PlaudTemplateApp/Resources/Assets.xcassets/AppIcon.appiconset/ | Drop in your 1024×1024 icon set. |
| Theme colors | PlaudTemplateApp/Common/PlaudTheme.swift | Edit the UIColor(hex:) constants. The template ships intentionally monochrome (#1f1f1f labels, #f9f9f9 background); add a brand-color constant here and reference it from your views. |
| Launch screen | PlaudTemplateApp/Info.plist → UILaunchScreen dict | Change UIColorName to your brand color, or replace the dict with a UILaunchStoryboardName pointing at a storyboard you add. |
Run & test with a real device
arm64-only.
Verify app launches, device pairs, recording syncs, and transcript appears on your iPhone.