> ## Documentation Index
> Fetch the complete documentation index at: https://docs.plaud.ai/llms.txt
> Use this file to discover all available pages before exploring further.
# Plaud MCP
> 將 Plaud 錄音連接至任何 MCP 相容的 AI 用戶端 — Claude、Cursor、ChatGPT、Codex 等。在不離開 AI 助理的情況下搜尋錄音、閱讀轉錄和產生文件。
## **支援用戶端**
| 用戶端 | 自動設定 | 安裝後重新啟動 |
| :-------------------------------- | :--- | :----------------- |
| Claude Desktop | ✓ | ⌘Q + 重新開啟 |
| Claude Code | ✓ | 退出 + 新 Claude 工作階段 |
| Codex Desktop | ✓ | 退出 + 重新開啟 |
| Cursor / Windsurf / VS Code / Zed | ✓ | 每個用戶端 UI 重新載入 |
| Claude Web / ChatGPT Web | 互動指南 | 不需要重新啟動 |
## **先決條件**
* Node.js ≥ 20 — [下載](https://nodejs.org/en)
* Plaud 帳戶
## **安裝**
執行一次。安裝程式會偵測您的 AI 用戶端,寫入 MCP 組態,並開啟瀏覽器以登入:
```bash theme={"system"}
npx -y @plaud-ai/mcp@latest install
```
瀏覽器開啟時,請按一下**授權**,然後重新啟動安裝程式輸出中列出的用戶端。Plaud 工具將在您的下一個工作階段中立即提供。
### **選項**
| 旗標 | 它的功能 |
| :--------- | :--------------------- |
| --yes | 自動設定所有偵測到的本機用戶端,且不顯示提示 |
| --no-login | 跳過瀏覽器登入步驟(適用於遠端或無螢幕主機) |
### **其他 MCP 用戶端**
如果系統未自動偵測到您的用戶端,請將此內容貼至用戶端的 MCP 組態中,以手動新增 Plaud:
```json theme={"system"}
{
"mcpServers": {
"plaud": {
"command": "npx",
"args": ["-y", "@plaud-ai/mcp@latest"]
}
}
}
```
\*\*❗ HTTP 用戶端 (Claude Web、ChatGPT Web):\*\*透過 HTTP 連線時,您的錄音資料會傳輸並通過 Plaud 的 MCP 伺服器(託管在美國)。Plaud 在請求完成後不會儲存這些資料 — 它僅在傳輸中進行處理。資料處理受 Plaud 的隱私權政策規範。
### **Claude Web**
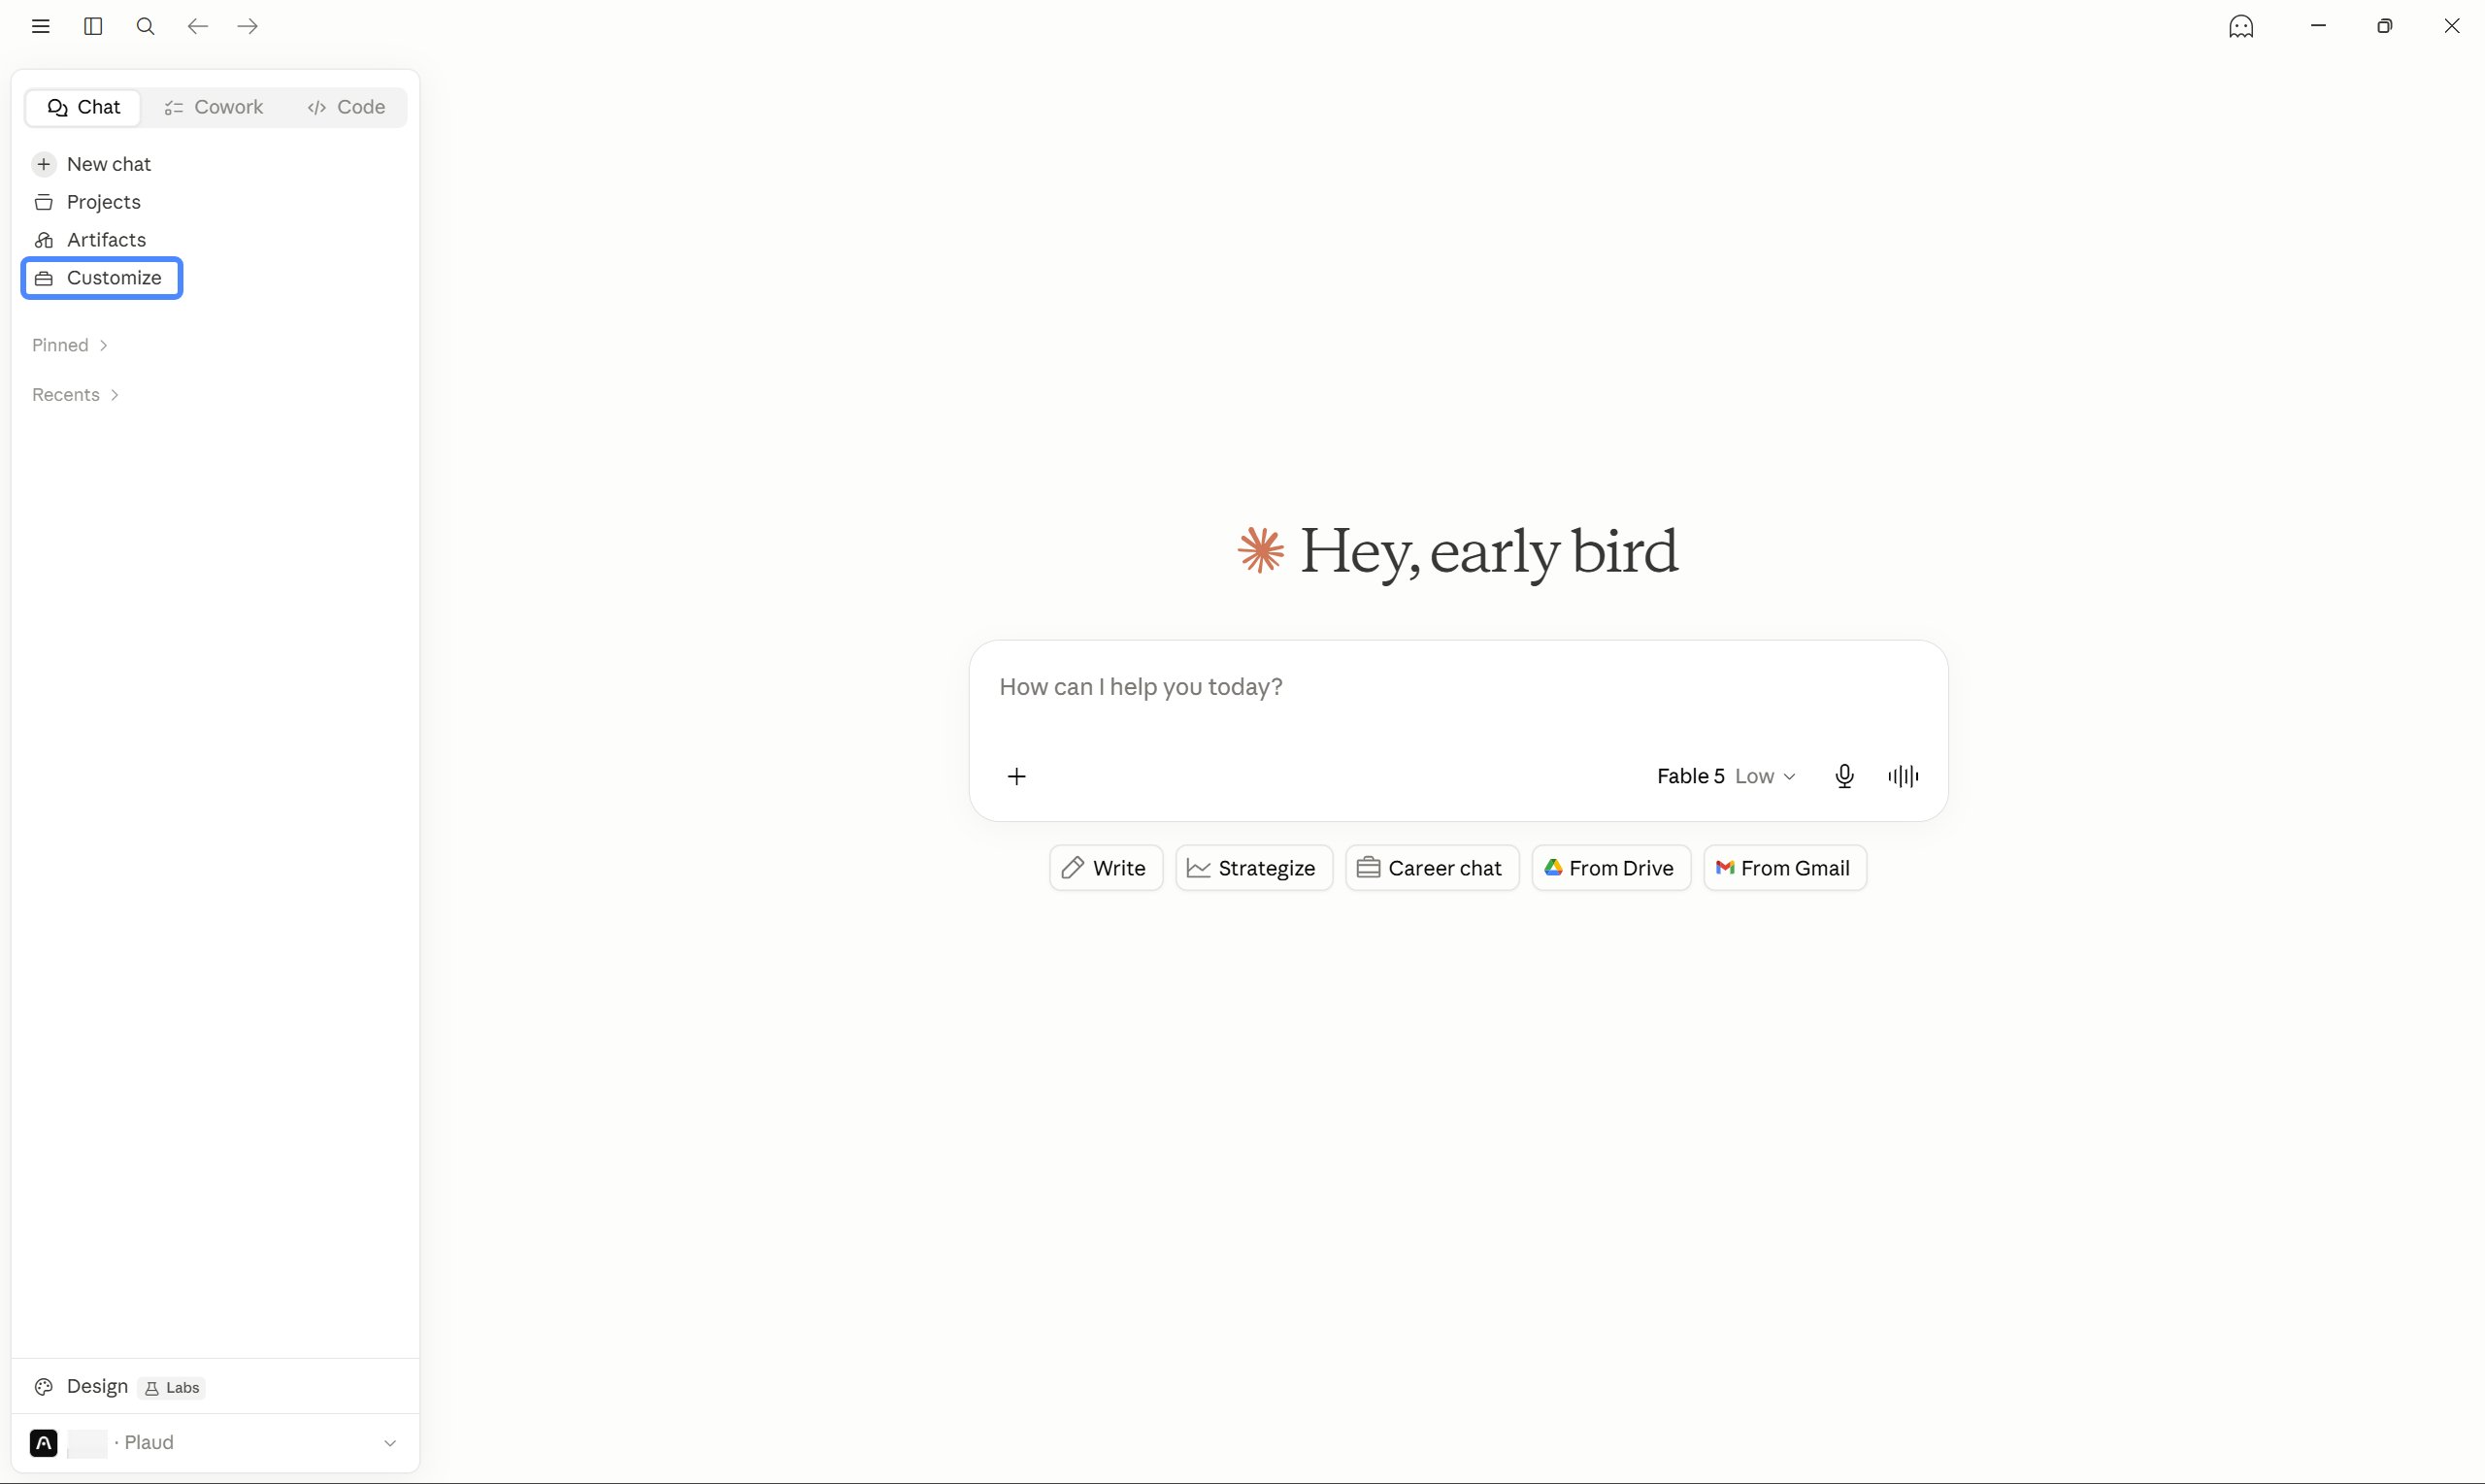
**1 — 開啟連接器**
前往 claude.ai,在左側邊欄中,按一下自訂→連接器。
**2 — 新增 Plaud MCP 伺服器**
按一下**新增自訂連接器**。填寫表格:
* 名稱 — Plaud
* 遠端 MCP 伺服器 URL — [https://mcp.plaud.ai/mcp](https://mcp.plaud.ai/mcp)
按一下**新增**。
 **3 — 授權**
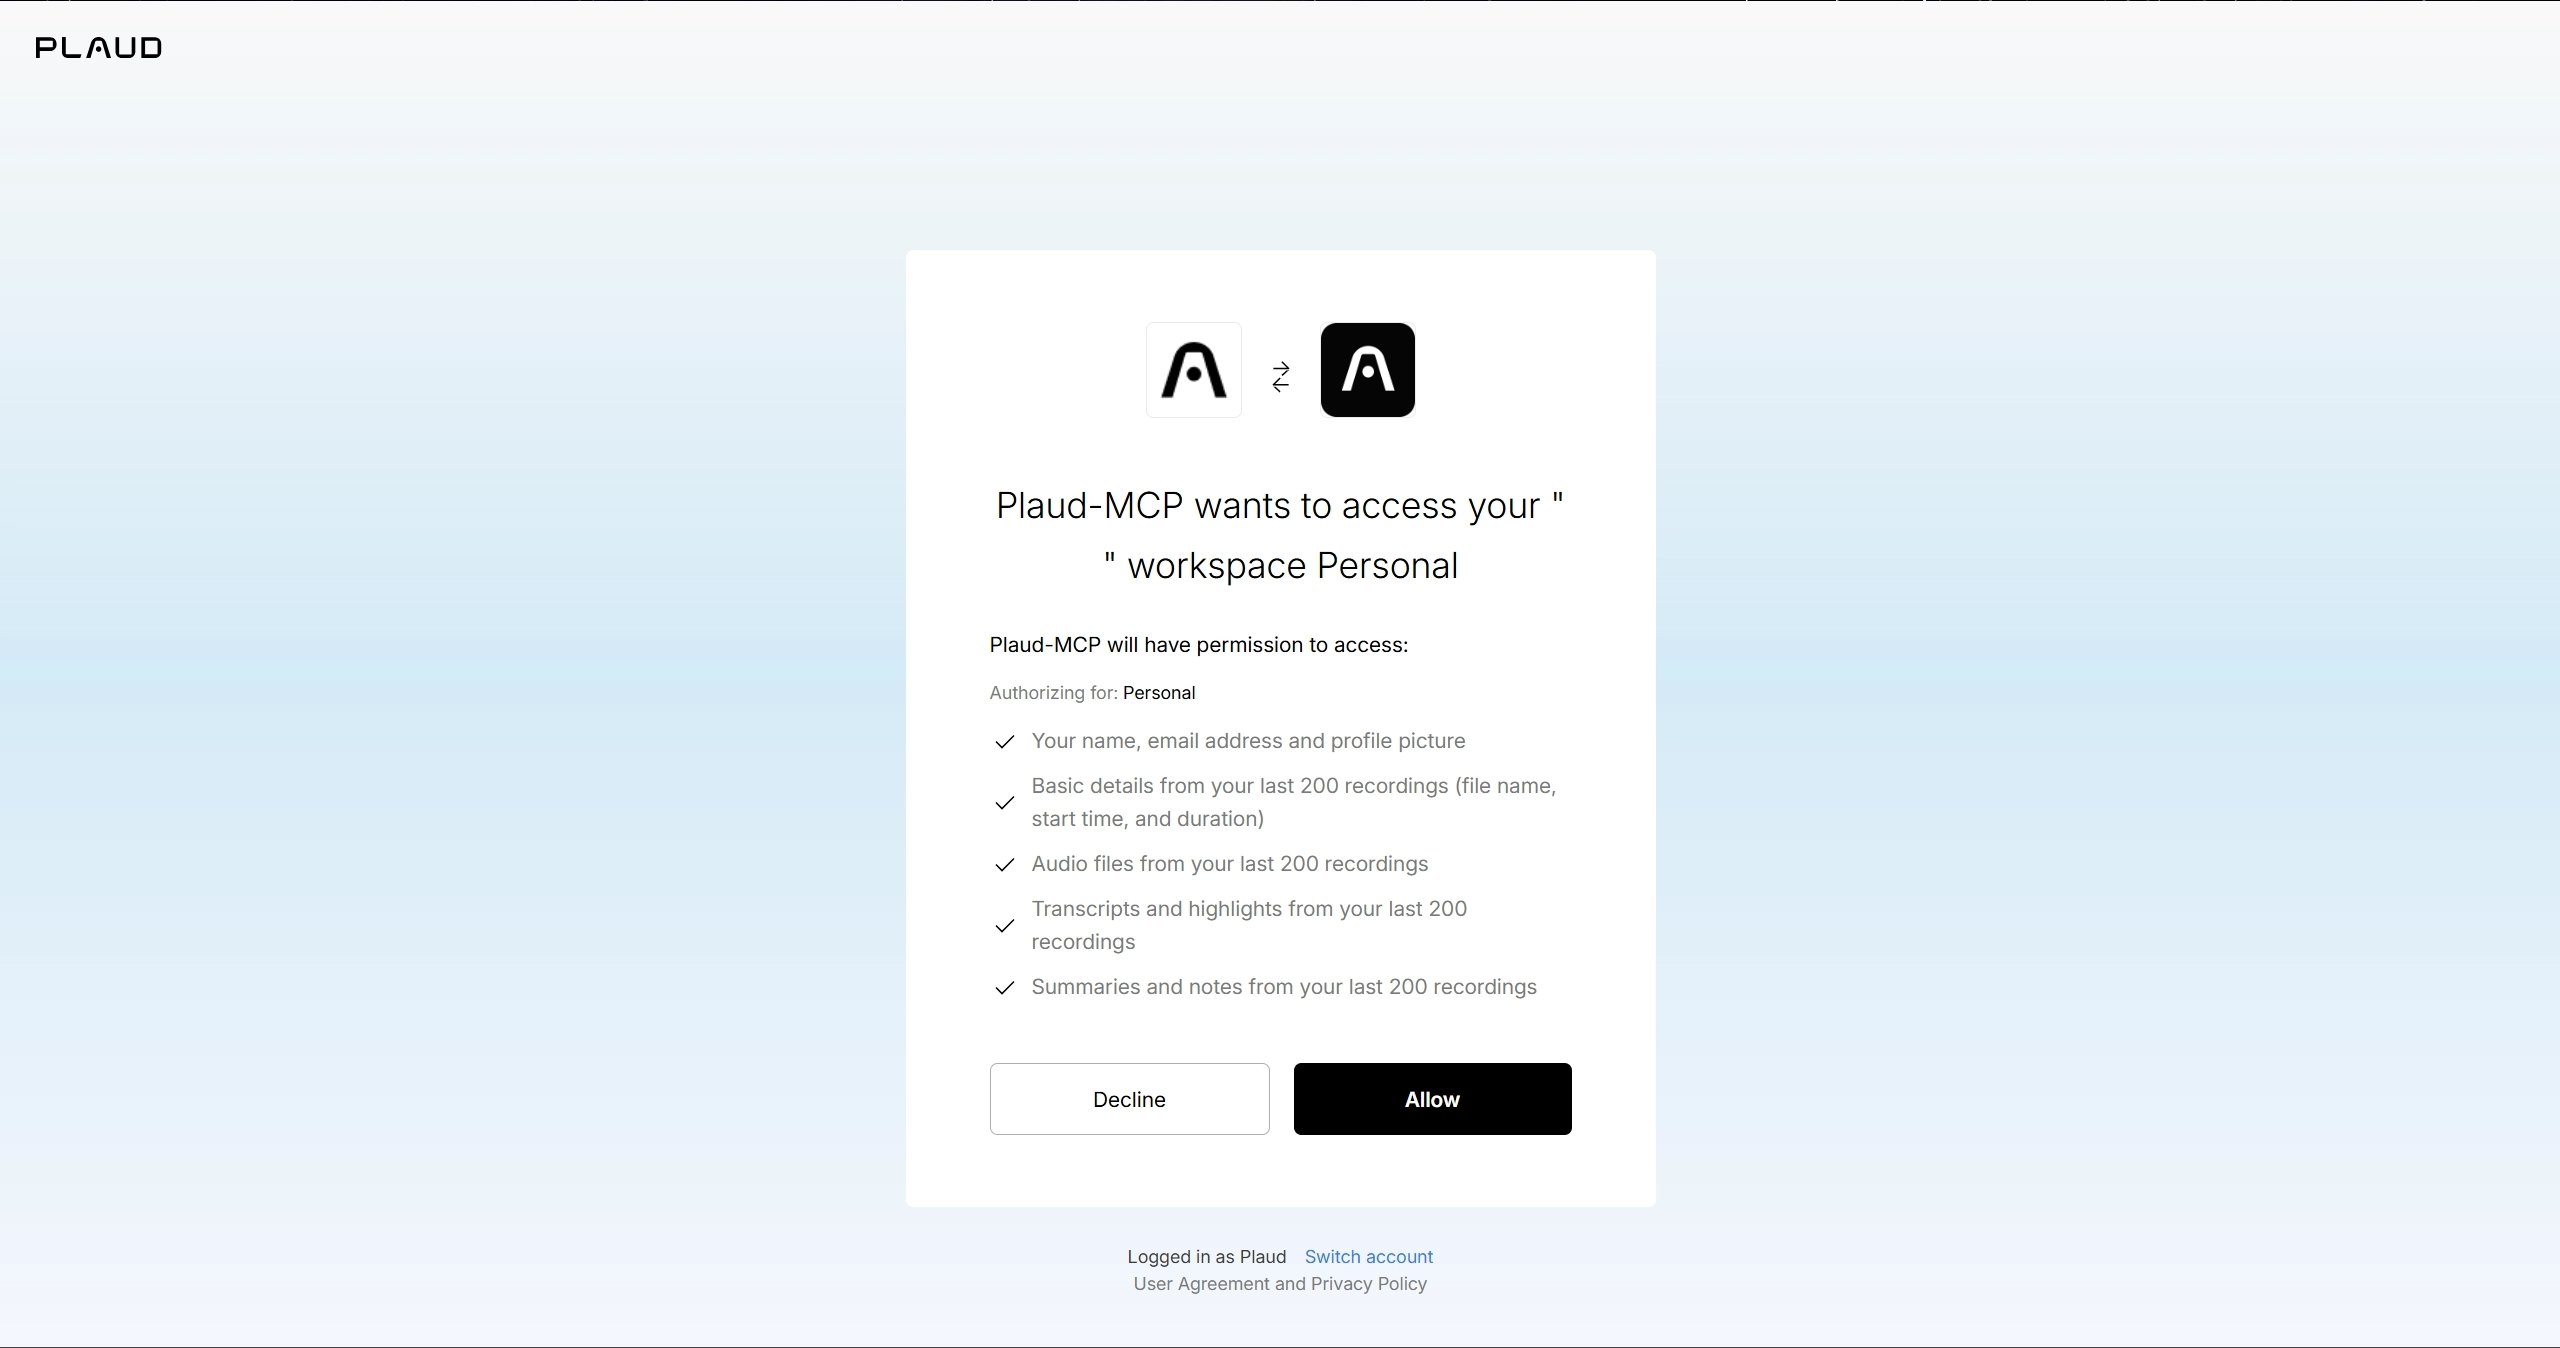
Claude 會在您的瀏覽器中開啟 Plaud 授權頁面。登入您的 Plaud 帳戶並按一下**授權**。返回 Claude — 您現在可以在對話中使用 Plaud 工具了。
**3 — 授權**
Claude 會在您的瀏覽器中開啟 Plaud 授權頁面。登入您的 Plaud 帳戶並按一下**授權**。返回 Claude — 您現在可以在對話中使用 Plaud 工具了。
 ### **ChatGPT 網頁版**
**1 — 啟用開發人員模式**
進入 chatgpt.com,按一下您的個人資料頭像,然後選擇 **設定 → 應用程式 → 進階設定**。開啟**開發人員模式**。
**2 — 建立 Plaud app**
按一下**建立應用程式**。填寫表格:
* 名稱 — Plaud
* MCP 伺服器 URL — [https://mcp.plaud.ai/mcp](https://mcp.plaud.ai/mcp)
* 驗證 — OAuth
勾選**我已了解並希望繼續**,然後按一下**建立**。
### **ChatGPT 網頁版**
**1 — 啟用開發人員模式**
進入 chatgpt.com,按一下您的個人資料頭像,然後選擇 **設定 → 應用程式 → 進階設定**。開啟**開發人員模式**。
**2 — 建立 Plaud app**
按一下**建立應用程式**。填寫表格:
* 名稱 — Plaud
* MCP 伺服器 URL — [https://mcp.plaud.ai/mcp](https://mcp.plaud.ai/mcp)
* 驗證 — OAuth
勾選**我已了解並希望繼續**,然後按一下**建立**。
 **3 — 授權**
ChatGPT 會將您重新導向到 Plaud 授權頁面。登入並按一下**授權**。返回 ChatGPT — 您現在可以在對話中使用 Plaud 工具了。
## **快速開始**
安裝後,請從 AI 用戶端登入:
* 讓我登入 Plaud
您的瀏覽器將開啟 Plaud 授權頁面。按一下**授權**,然後返回您的用戶端 — 您已登入。
然後嘗試:
* 列出我的最近錄音
* 摘要星期二的站立會議
* 根據此會議的行動事項擬定後續跟進電子郵件
## **工具**
Plaud MCP 連接後,這些工具可供您的 AI 用戶端使用:
| 工具 | 說明 |
| :----------------- | :-------------------- |
| login | 開啟您的瀏覽器以進行 OAuth 登入 |
| logout | 登出並撤銷您的授權 |
| get\_current\_user | 顯示您目前的帳戶詳細資訊 |
| list\_files | 列出您的錄音,並可選擇篩選條件 |
| get\_file | 傳回單一錄音的完整詳細資訊 |
| get\_note | 傳回 AI 生成的摘要、動作項目和關鍵主題 |
| get\_transcript | 傳回包含時間戳記與發言者標籤的完整轉錄 |
### **使用 list\_files 篩選錄音**
| 參數 | 說明 |
| :---------------- | :------------------- |
| query | 針對錄音名稱進行不區分大小寫的關鍵字比對 |
| date\_from | 開始日期,YYYY-MM-DD |
| date\_to | 結束日期,YYYY-MM-DD |
| page / page\_size | 分頁(設定篩選條件時會忽略此設定) |
## **資料參照**
### **list\_files 與 get\_file 傳回的欄位**
| 欄位 | 類型 | 說明 |
| :------------- | :- | :---------------- |
| id | 字串 | 唯一錄音 ID |
| name | 字串 | 錄音名稱 |
| created\_at | 字串 | 建立時間 (ISO 8601) |
| start\_at | 字串 | 錄音開始時間 (ISO 8601) |
| duration | 數值 | 以毫秒為單位的時長 |
| serial\_number | 字串 | 裝置序號 |
### **僅由 get\_file 傳回的額外欄位**
| 欄位 | 類型 | 說明 |
| :------------- | :- | :------------------- |
| presigned\_url | 字串 | 臨時音訊下載連結(24 小時內有效) |
| source\_list | 陣列 | 包含時間戳記與發言者標籤的轉錄片段 |
| note\_list | 陣列 | Markdown 格式的 AI 生成筆記 |
## **技能**
技能是內建的指令集,可協助您的 AI 用戶端自動處理常見的 Plaud 工作流程。它們會在安裝程式執行時一併載入,無需額外步驟。
| 技能 | 當您詢問類似以下問題時即會觸發… |
| :------------- | :----------------------- |
| plaud-browse | 「列出我的錄音」,「顯示最近的檔案」 |
| plaud-find | 「尋找每週同步」,「星期一的會議」 |
| plaud-read | 「顯示錄音」,「總結這段錄音」 |
| plaud-digest | 「每週報告」, 「這星期我有什麼會議」 |
| plaud-followup | 「擬定後續追蹤郵件」,「列出行動事項」 |
| plaud-export | 「儲存至 Notion」、「張貼到 Slack」 |
## **升級**
```bash theme={"system"}
npm install -g @plaud-ai/mcp@latest
```
升級後重新啟動 AI 用戶端。
專門針對 Claude Code:
```bash theme={"system"}
npx -y @plaud-ai/mcp clean-plugin
```
然後在 Claude Code 中重新安裝:
```bash theme={"system"}
/plugin install plaud
```
## **解除安裝**
| 用戶端 | 清理命令 |
| :------------- | :------------------------------------------------------------------------ |
| Claude Desktop | plaud-mcp unsetup |
| Claude Code | claude mcp remove plaud --scope user && npx -y @plaud-ai/mcp clean-plugin |
| Codex Desktop | plaud-mcp unsetup codex |
然後移除套件和本機資料:
```bash theme={"system"}
npm uninstall -g @plaud-ai/mcp
rm -rf ~/.plaud
```
## **疑難排解**
| 症狀 | 修正 |
| :-------------------------- | :---------------------------------------------------------------------------------------- |
| 安裝後未顯示 Plaud 工具 | 請確保您已將用戶端完全重新啟動,僅關閉並重新開啟視窗是不夠的。若使用 Claude Code,請退出並啟動新的 claude 工作階段。 |
| 401 / 「未驗證」錯誤 | 請對 AI 用戶端說:「*讓我登入 Plaud」*。 |
| 在 --yes 模式中未設定本機用戶端 | 首先安裝受支援的本機用戶端,或不使用 --yes 模式執行,以獲得 Web 用戶端的互動指引。 |
| 權杖重新整理錯誤 | 刪除 \~/.plaud/tokens-mcp.json 並重新登入。 |
| 瀏覽器在登入期間無法開啟 | 複製安裝程式顯示的 URL,並手動將它開啟。在遠端主機上,請先轉送通訊埠 8199:ssh -L 8199:localhost:8199 user\@host。 |
| Claude Desktop 中的「伺服器已中斷連接」 | 重新執行設定:plaud-mcp unsetup && plaud-mcp setup,然後重新啟動 Claude Desktop。 |
| 版本在升級後未更新 | 執行 npx -y @plaud-ai/mcp clean-plugin,在 Claude Code 中使用 /plugin install plaud 重新安裝,然後重新啟動。 |
**3 — 授權**
ChatGPT 會將您重新導向到 Plaud 授權頁面。登入並按一下**授權**。返回 ChatGPT — 您現在可以在對話中使用 Plaud 工具了。
## **快速開始**
安裝後,請從 AI 用戶端登入:
* 讓我登入 Plaud
您的瀏覽器將開啟 Plaud 授權頁面。按一下**授權**,然後返回您的用戶端 — 您已登入。
然後嘗試:
* 列出我的最近錄音
* 摘要星期二的站立會議
* 根據此會議的行動事項擬定後續跟進電子郵件
## **工具**
Plaud MCP 連接後,這些工具可供您的 AI 用戶端使用:
| 工具 | 說明 |
| :----------------- | :-------------------- |
| login | 開啟您的瀏覽器以進行 OAuth 登入 |
| logout | 登出並撤銷您的授權 |
| get\_current\_user | 顯示您目前的帳戶詳細資訊 |
| list\_files | 列出您的錄音,並可選擇篩選條件 |
| get\_file | 傳回單一錄音的完整詳細資訊 |
| get\_note | 傳回 AI 生成的摘要、動作項目和關鍵主題 |
| get\_transcript | 傳回包含時間戳記與發言者標籤的完整轉錄 |
### **使用 list\_files 篩選錄音**
| 參數 | 說明 |
| :---------------- | :------------------- |
| query | 針對錄音名稱進行不區分大小寫的關鍵字比對 |
| date\_from | 開始日期,YYYY-MM-DD |
| date\_to | 結束日期,YYYY-MM-DD |
| page / page\_size | 分頁(設定篩選條件時會忽略此設定) |
## **資料參照**
### **list\_files 與 get\_file 傳回的欄位**
| 欄位 | 類型 | 說明 |
| :------------- | :- | :---------------- |
| id | 字串 | 唯一錄音 ID |
| name | 字串 | 錄音名稱 |
| created\_at | 字串 | 建立時間 (ISO 8601) |
| start\_at | 字串 | 錄音開始時間 (ISO 8601) |
| duration | 數值 | 以毫秒為單位的時長 |
| serial\_number | 字串 | 裝置序號 |
### **僅由 get\_file 傳回的額外欄位**
| 欄位 | 類型 | 說明 |
| :------------- | :- | :------------------- |
| presigned\_url | 字串 | 臨時音訊下載連結(24 小時內有效) |
| source\_list | 陣列 | 包含時間戳記與發言者標籤的轉錄片段 |
| note\_list | 陣列 | Markdown 格式的 AI 生成筆記 |
## **技能**
技能是內建的指令集,可協助您的 AI 用戶端自動處理常見的 Plaud 工作流程。它們會在安裝程式執行時一併載入,無需額外步驟。
| 技能 | 當您詢問類似以下問題時即會觸發… |
| :------------- | :----------------------- |
| plaud-browse | 「列出我的錄音」,「顯示最近的檔案」 |
| plaud-find | 「尋找每週同步」,「星期一的會議」 |
| plaud-read | 「顯示錄音」,「總結這段錄音」 |
| plaud-digest | 「每週報告」, 「這星期我有什麼會議」 |
| plaud-followup | 「擬定後續追蹤郵件」,「列出行動事項」 |
| plaud-export | 「儲存至 Notion」、「張貼到 Slack」 |
## **升級**
```bash theme={"system"}
npm install -g @plaud-ai/mcp@latest
```
升級後重新啟動 AI 用戶端。
專門針對 Claude Code:
```bash theme={"system"}
npx -y @plaud-ai/mcp clean-plugin
```
然後在 Claude Code 中重新安裝:
```bash theme={"system"}
/plugin install plaud
```
## **解除安裝**
| 用戶端 | 清理命令 |
| :------------- | :------------------------------------------------------------------------ |
| Claude Desktop | plaud-mcp unsetup |
| Claude Code | claude mcp remove plaud --scope user && npx -y @plaud-ai/mcp clean-plugin |
| Codex Desktop | plaud-mcp unsetup codex |
然後移除套件和本機資料:
```bash theme={"system"}
npm uninstall -g @plaud-ai/mcp
rm -rf ~/.plaud
```
## **疑難排解**
| 症狀 | 修正 |
| :-------------------------- | :---------------------------------------------------------------------------------------- |
| 安裝後未顯示 Plaud 工具 | 請確保您已將用戶端完全重新啟動,僅關閉並重新開啟視窗是不夠的。若使用 Claude Code,請退出並啟動新的 claude 工作階段。 |
| 401 / 「未驗證」錯誤 | 請對 AI 用戶端說:「*讓我登入 Plaud」*。 |
| 在 --yes 模式中未設定本機用戶端 | 首先安裝受支援的本機用戶端,或不使用 --yes 模式執行,以獲得 Web 用戶端的互動指引。 |
| 權杖重新整理錯誤 | 刪除 \~/.plaud/tokens-mcp.json 並重新登入。 |
| 瀏覽器在登入期間無法開啟 | 複製安裝程式顯示的 URL,並手動將它開啟。在遠端主機上,請先轉送通訊埠 8199:ssh -L 8199:localhost:8199 user\@host。 |
| Claude Desktop 中的「伺服器已中斷連接」 | 重新執行設定:plaud-mcp unsetup && plaud-mcp setup,然後重新啟動 Claude Desktop。 |
| 版本在升級後未更新 | 執行 npx -y @plaud-ai/mcp clean-plugin,在 Claude Code 中使用 /plugin install plaud 重新安裝,然後重新啟動。 |