> ## Documentation Index
> Fetch the complete documentation index at: https://docs.plaud.ai/llms.txt
> Use this file to discover all available pages before exploring further.
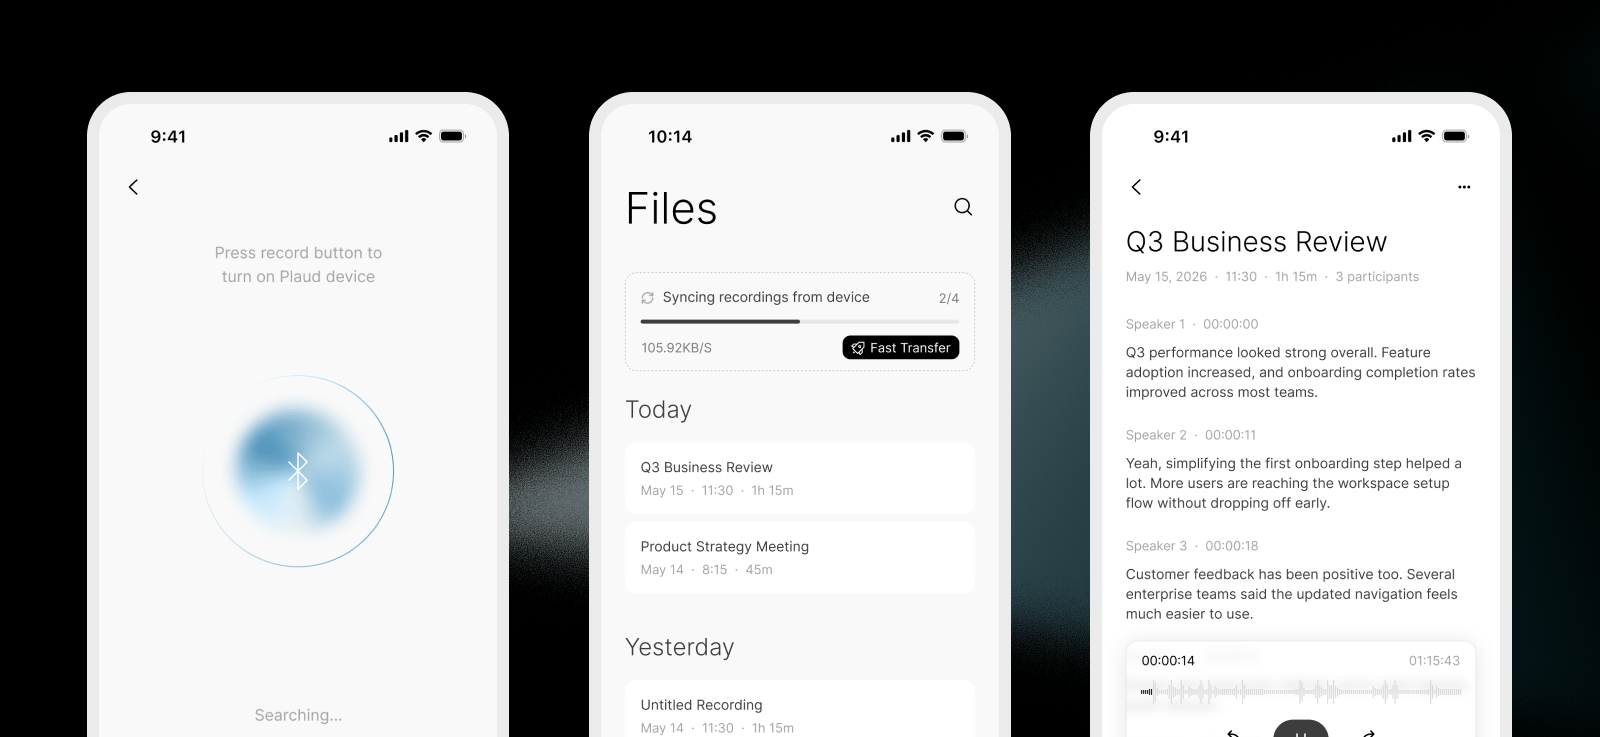
# Android Starter App
> Build a branded iOS app that connects to Plaud devices in minutes using the iOS starter app.
This guide walks through the process of building a native Android [Starter App](/plaud-embedded/starter-app-specs) that:
1. Connects to Plaud devices
2. Syncs recordings from Plaud device to mobile phone
3. Uploads recordings from your users' mobile phone to Plaud's file storage
4. Transcribes recordings with the [Transcription API](/plaud-embedded/transcription-api-overview)
 ## Onboard to the Plaud Developer Platform
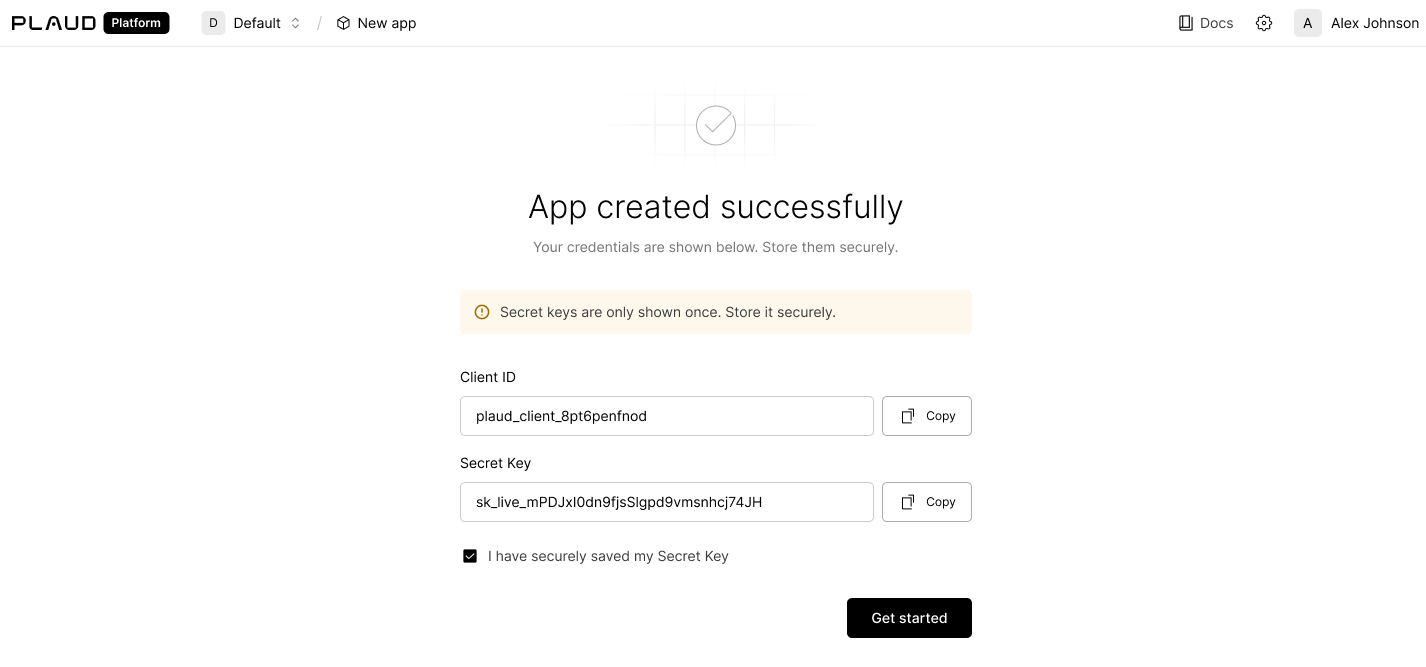
Sign in to the [Plaud Developer Portal](https://portal.plaud.ai/) (It's completely free with a generous device connection limit and transcription usage).
Create an **Embedded SDK Application** to receive your **Client ID** and **Secret Key**.
## Onboard to the Plaud Developer Platform
Sign in to the [Plaud Developer Portal](https://portal.plaud.ai/) (It's completely free with a generous device connection limit and transcription usage).
Create an **Embedded SDK Application** to receive your **Client ID** and **Secret Key**.
 ## Set Up the Starter App
**Try the Plaud Embedded Skill** to have your coding agent help you through your Starter App deployment.
```bash theme={"system"}
npx skills add Plaud-AI/plaud-embedded-skills
```
Visit our [GitHub repo](https://github.com/Plaud-AI/plaud-embedded-skills.git) for more details on the skill.
### Prerequisites
* Android Studio (JDK 17)
* minSdk 21 (Android 5.0+), compileSdk 34
* A **physical Android device** — the SDK libraries are `arm64-v8a`/`armeabi-v7a`, Android simulators are not supported
* A Plaud device for end-to-end testing
### Clone the starter app
You can find the GitHub repository for the [starter app here](https://github.com/plaud-ai/plaud-template-app).
```bash theme={"system"}
git clone https://github.com/plaud-ai/plaud-sdk-public.git
cd android
```
Install [Android Studio](https://developer.android.com/) to build and test your Android Starter app.
```bash theme={"system"}
brew install --cask android-studio
```
### Retrieve a user token
The `USER_ACCESS_TOKEN` is the per-user JWT your backend mints by calling `POST /open/partner/users/access-token`. See the [Authorization API reference](/plaud-embedded/auth-api-overview) for the full exchange flow.
### Configure credentials
After navigating to the `/android` directory, create a `local.properties` file (gitignored) and add the **user token, client ID, and API key** (if using transcription).
```bash local.properties theme={"system"}
sdk.dir=/path/to/your/Android/sdk
# Required for SDK initialization
PLAUD_USER_ACCESS_TOKEN=your-jwt-token
# Required for Transcription API (optional, not needed for device features)
PLAUD_CLIENT_ID=your-client-id
PLAUD_API_KEY=your-api-key
```
### (Optional) Apply branding
Four places control the entire visual identity:
#### App Name
Navigate to `app/src/main/res/values/strings.xml`. You can modify the app name, and other text on the welcome screen.
```xml strings.xml theme={"system"}
Plaud Template
App name
Get Started
Connect device later
```
#### App icon
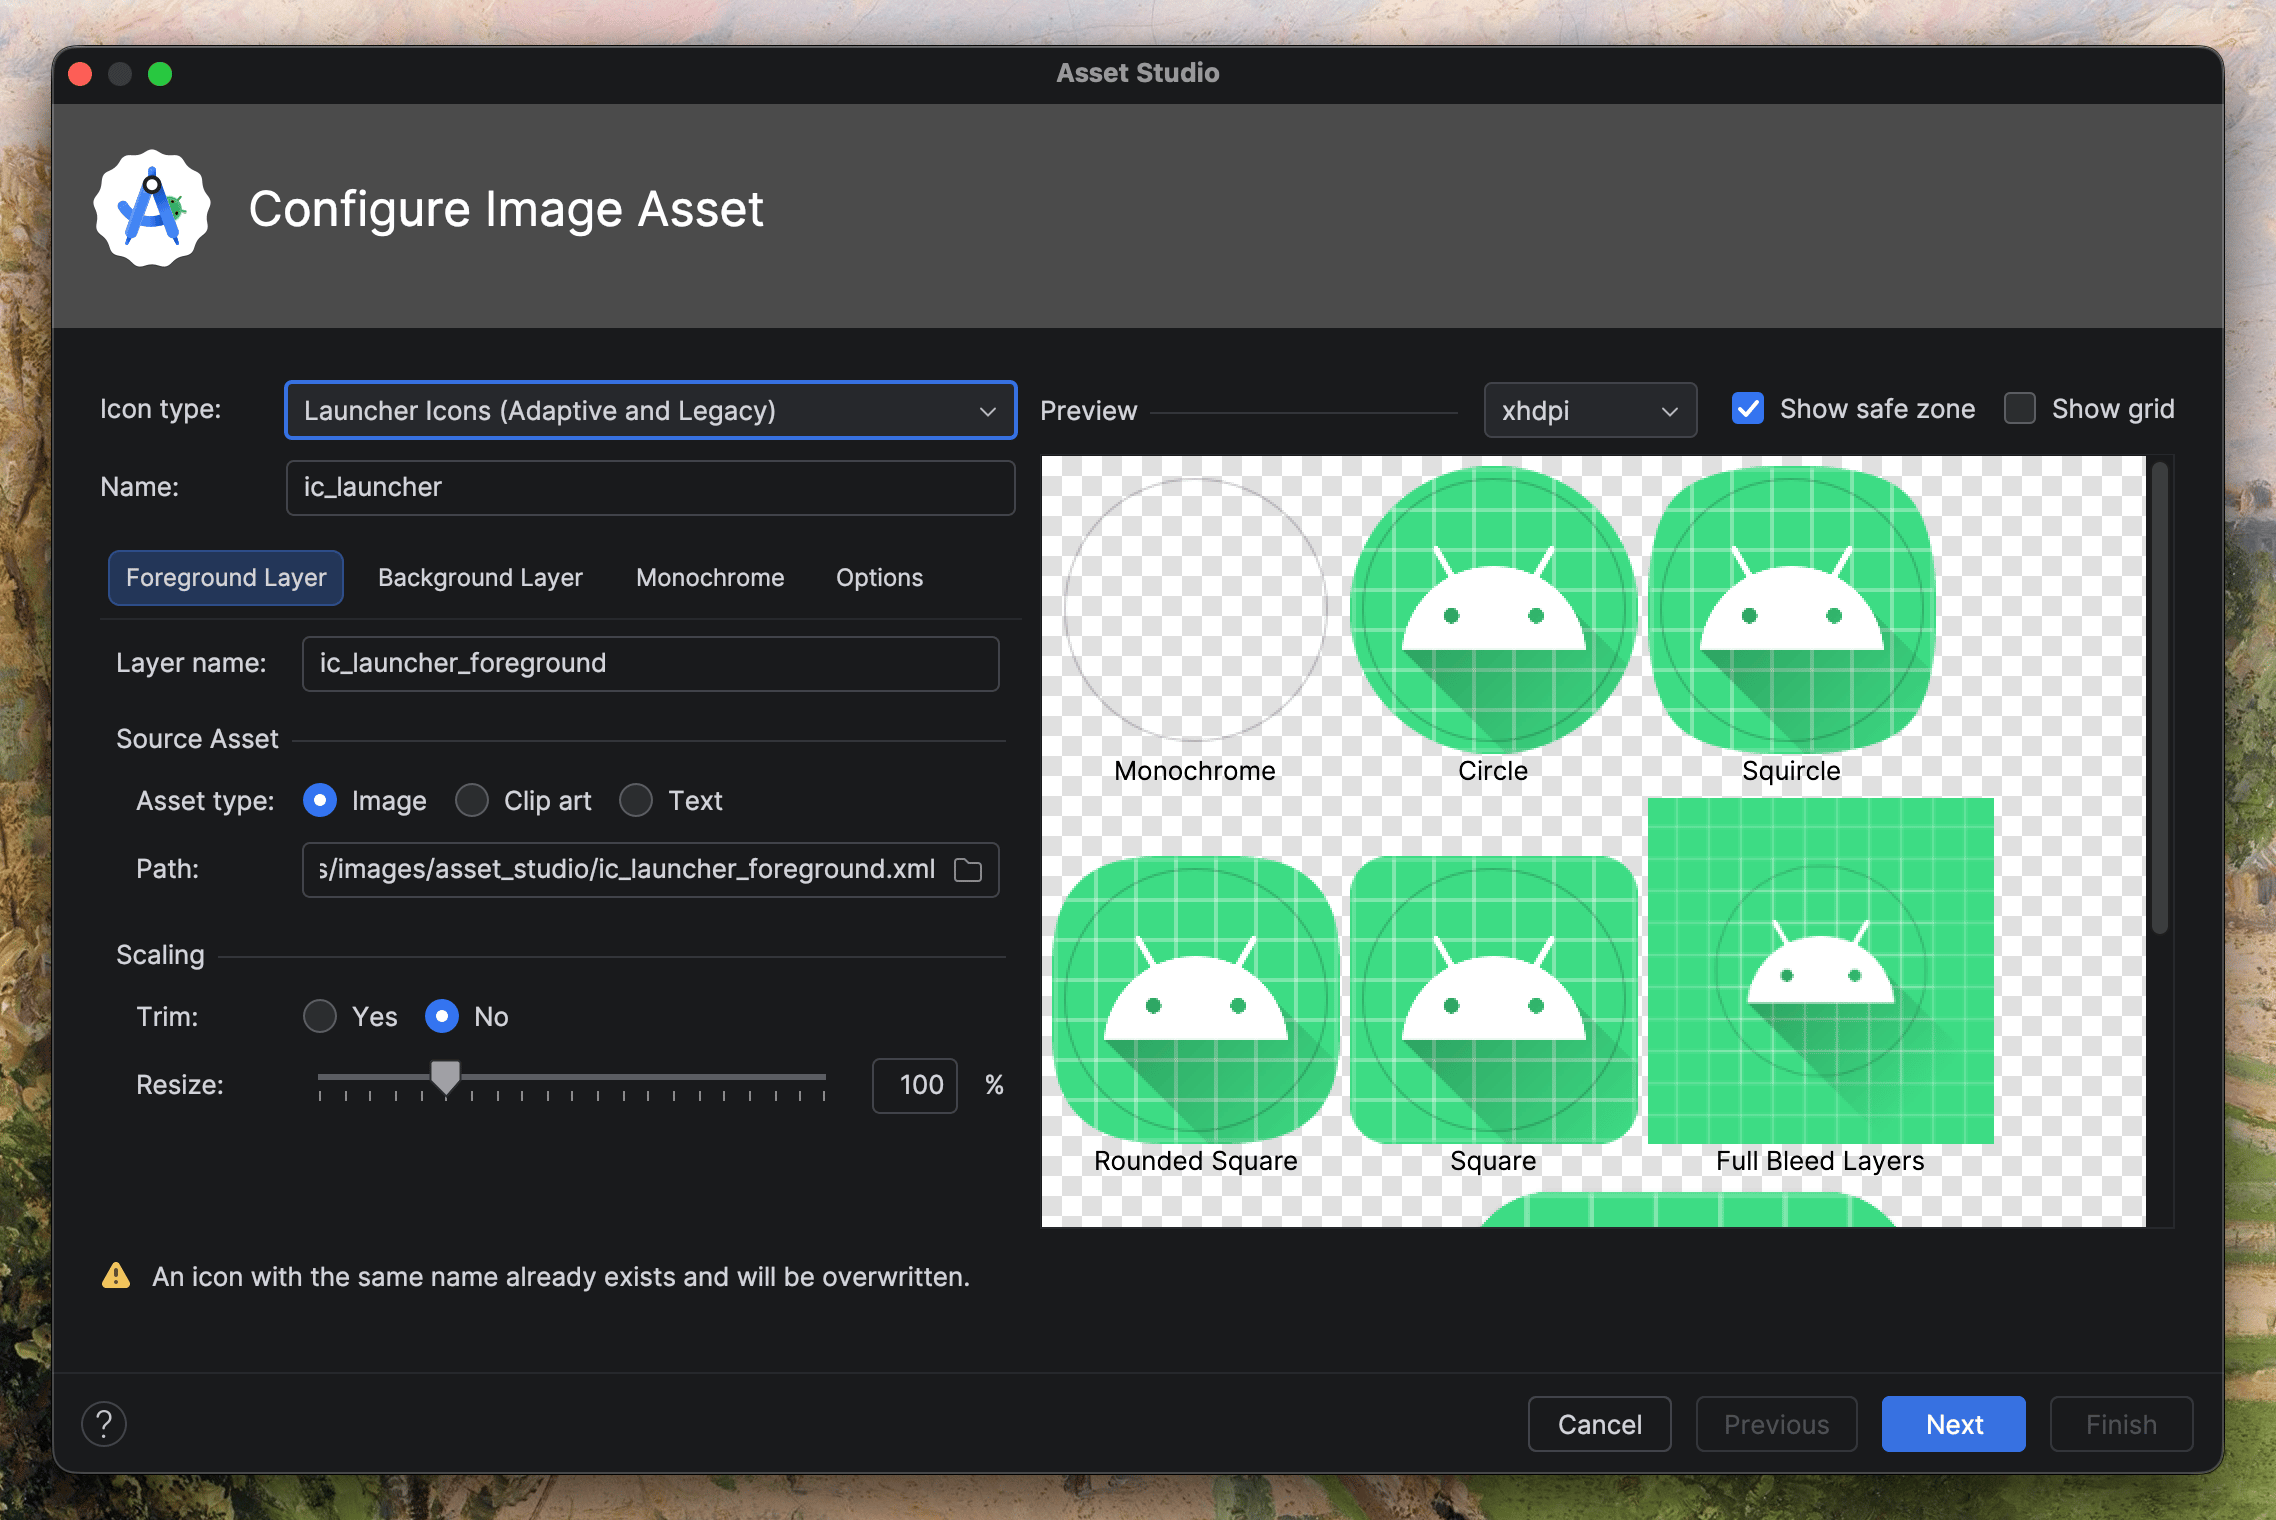
Create new image assets directly in Android Studio. Right-click `res`, then go to `New > Image Asset`.
## Set Up the Starter App
**Try the Plaud Embedded Skill** to have your coding agent help you through your Starter App deployment.
```bash theme={"system"}
npx skills add Plaud-AI/plaud-embedded-skills
```
Visit our [GitHub repo](https://github.com/Plaud-AI/plaud-embedded-skills.git) for more details on the skill.
### Prerequisites
* Android Studio (JDK 17)
* minSdk 21 (Android 5.0+), compileSdk 34
* A **physical Android device** — the SDK libraries are `arm64-v8a`/`armeabi-v7a`, Android simulators are not supported
* A Plaud device for end-to-end testing
### Clone the starter app
You can find the GitHub repository for the [starter app here](https://github.com/plaud-ai/plaud-template-app).
```bash theme={"system"}
git clone https://github.com/plaud-ai/plaud-sdk-public.git
cd android
```
Install [Android Studio](https://developer.android.com/) to build and test your Android Starter app.
```bash theme={"system"}
brew install --cask android-studio
```
### Retrieve a user token
The `USER_ACCESS_TOKEN` is the per-user JWT your backend mints by calling `POST /open/partner/users/access-token`. See the [Authorization API reference](/plaud-embedded/auth-api-overview) for the full exchange flow.
### Configure credentials
After navigating to the `/android` directory, create a `local.properties` file (gitignored) and add the **user token, client ID, and API key** (if using transcription).
```bash local.properties theme={"system"}
sdk.dir=/path/to/your/Android/sdk
# Required for SDK initialization
PLAUD_USER_ACCESS_TOKEN=your-jwt-token
# Required for Transcription API (optional, not needed for device features)
PLAUD_CLIENT_ID=your-client-id
PLAUD_API_KEY=your-api-key
```
### (Optional) Apply branding
Four places control the entire visual identity:
#### App Name
Navigate to `app/src/main/res/values/strings.xml`. You can modify the app name, and other text on the welcome screen.
```xml strings.xml theme={"system"}
Plaud Template
App name
Get Started
Connect device later
```
#### App icon
Create new image assets directly in Android Studio. Right-click `res`, then go to `New > Image Asset`.
 #### Theme colors
In `res/values/colors.xml`, you have full control over te starter apps primary colors and color pallete.
```xml colors.xml theme={"system"}
#F9F9F9
#1F1F1F
#A3A3A3
#EBEBEB
```
## Run & test with a real device
Open **Android Studio**, and wait for gradle to finish building the app.
Once indexing and build is finished, **connect your physical Android device** and run the app.
#### Theme colors
In `res/values/colors.xml`, you have full control over te starter apps primary colors and color pallete.
```xml colors.xml theme={"system"}
#F9F9F9
#1F1F1F
#A3A3A3
#EBEBEB
```
## Run & test with a real device
Open **Android Studio**, and wait for gradle to finish building the app.
Once indexing and build is finished, **connect your physical Android device** and run the app.
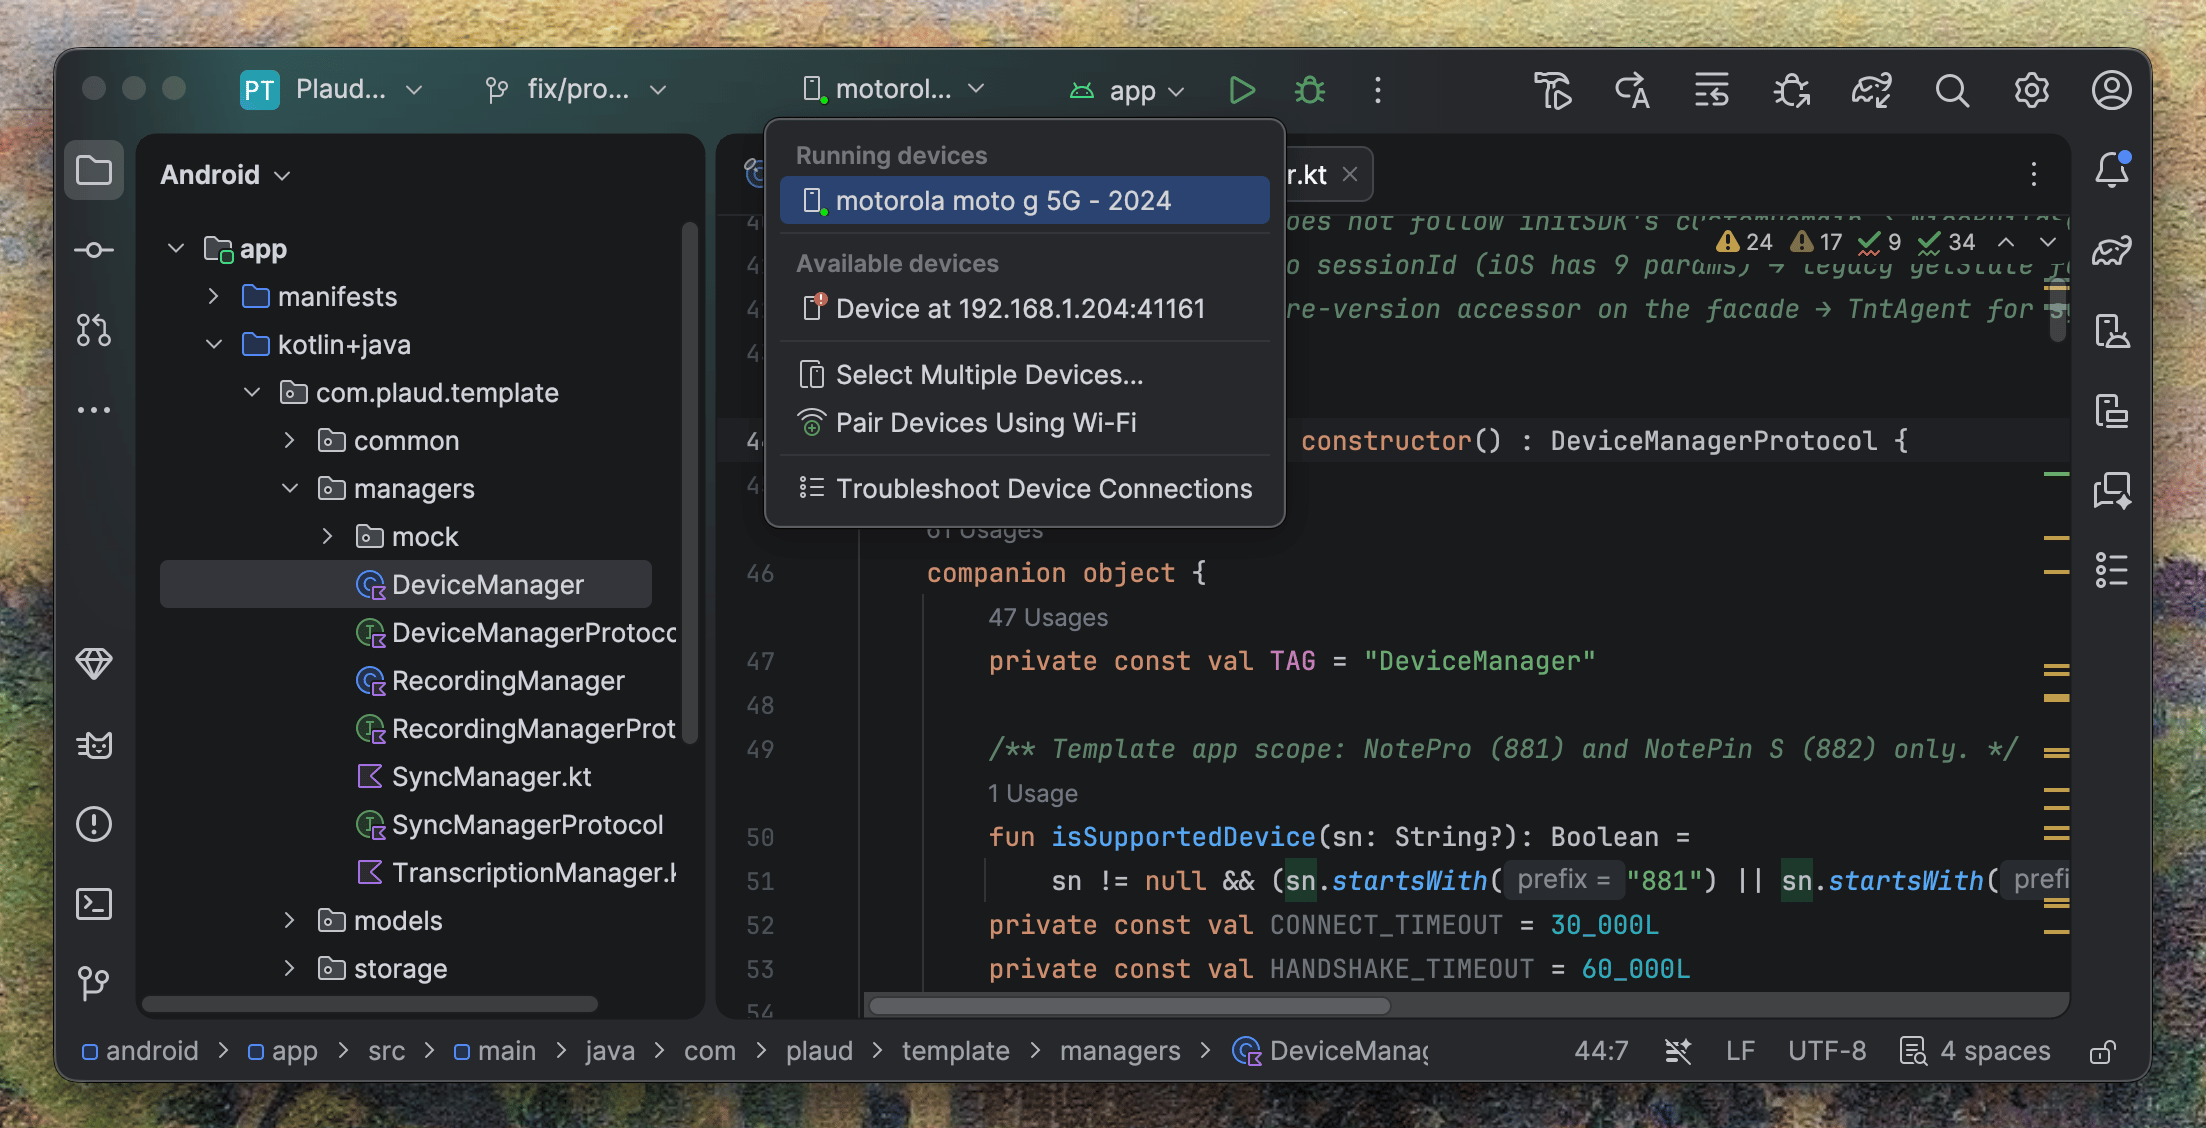 Verify app launches, device pairs, recording syncs, and transcript appears on your Android app.
**Unbind your Plaud device after testing and before uninstalling the Starter App!**
Plaud devices can only be bound to one application at a time (tied to your Partner Token). You will not be able to bind your Plaud device to another app (or the Plaud App) before unbinding from the Starter App.
## Publishing to the Google Play Store
You will need a [Google Play Developer Account](https://play.google.com/console/signup) to publish to the Play Store (current pricing is a **one-time \$25 registration fee**).
Google requires identity verification, and organization accounts also require D-U-N-S number verification — start this early, as it can take a few days.
In `app/build.gradle.kts`, replace the template's application ID with your own **unique** reverse-domain identifier. This value can never be changed once the app is published.
```kotlin app/build.gradle theme={"system"}
android {
namespace 'com.plaud.template'// [!code --]
namespace 'com.yourorg.yourapp'// [!code ++]
compileSdk 34
defaultConfig {
applicationId "com.plaud.template"// [!code --]
applicationId "com.yourorg.yourapp"// [!code ++]
minSdk 21
```
Bump `versionCode` on every upload — Play Console rejects a build that reuses a `versionCode` already in the track.
Play requires every build to be signed with a consistent upload key. In Android Studio, go to `Build > Generate Signed App Bundle / APK`, choose **Android App Bundle**, then `Create new...` to generate a keystore.
```bash theme={"system"}
keytool -genkey -v -keystore upload-keystore.jks \
-keyalg RSA -keysize 2048 -validity 10000 -alias upload
```
Store the keystore file and its passwords somewhere safe and **out of version control**. Losing your upload key means you can't ship updates to an existing listing without going through Google's key reset process.
Keep the credentials in `local.properties` (gitignored) alongside your Plaud credentials, and reference them from a `signingConfigs` block in `app/build.gradle.kts`.
Finish the `Build > Generate Signed App Bundle / APK` flow with the `release` build variant. Android Studio writes the bundle to `app/release/app-release.aab`.
```bash theme={"system"}
./gradlew bundleRelease
```
The Plaud SDK ships `arm64-v8a` and `armeabi-v7a` native libraries. Leave ABI splits and `abiFilters` alone so both are packaged — Play serves the right slice per device automatically.
In [Play Console](https://play.google.com/console), select `Create app`, then set your app name, default language, app type, and free/paid status. The application ID from Step 2 is claimed when you upload your first bundle.
Under `Testing > Internal testing`, create a release and upload your `.aab`. Add your testers by email or Google Group, then share the opt-in link with them.
Work through the `Dashboard` checklist. Items to emphasize for a conversation capture app are:
1. **Data safety**
2. **Permissions declaration**: the SDK requires Bluetooth and (on Android 11 and below) location permissions to scan for and connect to Plaud devices.
3. **Privacy policy**
4. **Store listing assets** — app icon (512×512), feature graphic (1024×500), and at least two phone screenshots.
Once the checklist is complete, submit your production release for review! Google's review typically takes a few days for a first submission.
Verify app launches, device pairs, recording syncs, and transcript appears on your Android app.
**Unbind your Plaud device after testing and before uninstalling the Starter App!**
Plaud devices can only be bound to one application at a time (tied to your Partner Token). You will not be able to bind your Plaud device to another app (or the Plaud App) before unbinding from the Starter App.
## Publishing to the Google Play Store
You will need a [Google Play Developer Account](https://play.google.com/console/signup) to publish to the Play Store (current pricing is a **one-time \$25 registration fee**).
Google requires identity verification, and organization accounts also require D-U-N-S number verification — start this early, as it can take a few days.
In `app/build.gradle.kts`, replace the template's application ID with your own **unique** reverse-domain identifier. This value can never be changed once the app is published.
```kotlin app/build.gradle theme={"system"}
android {
namespace 'com.plaud.template'// [!code --]
namespace 'com.yourorg.yourapp'// [!code ++]
compileSdk 34
defaultConfig {
applicationId "com.plaud.template"// [!code --]
applicationId "com.yourorg.yourapp"// [!code ++]
minSdk 21
```
Bump `versionCode` on every upload — Play Console rejects a build that reuses a `versionCode` already in the track.
Play requires every build to be signed with a consistent upload key. In Android Studio, go to `Build > Generate Signed App Bundle / APK`, choose **Android App Bundle**, then `Create new...` to generate a keystore.
```bash theme={"system"}
keytool -genkey -v -keystore upload-keystore.jks \
-keyalg RSA -keysize 2048 -validity 10000 -alias upload
```
Store the keystore file and its passwords somewhere safe and **out of version control**. Losing your upload key means you can't ship updates to an existing listing without going through Google's key reset process.
Keep the credentials in `local.properties` (gitignored) alongside your Plaud credentials, and reference them from a `signingConfigs` block in `app/build.gradle.kts`.
Finish the `Build > Generate Signed App Bundle / APK` flow with the `release` build variant. Android Studio writes the bundle to `app/release/app-release.aab`.
```bash theme={"system"}
./gradlew bundleRelease
```
The Plaud SDK ships `arm64-v8a` and `armeabi-v7a` native libraries. Leave ABI splits and `abiFilters` alone so both are packaged — Play serves the right slice per device automatically.
In [Play Console](https://play.google.com/console), select `Create app`, then set your app name, default language, app type, and free/paid status. The application ID from Step 2 is claimed when you upload your first bundle.
Under `Testing > Internal testing`, create a release and upload your `.aab`. Add your testers by email or Google Group, then share the opt-in link with them.
Work through the `Dashboard` checklist. Items to emphasize for a conversation capture app are:
1. **Data safety**
2. **Permissions declaration**: the SDK requires Bluetooth and (on Android 11 and below) location permissions to scan for and connect to Plaud devices.
3. **Privacy policy**
4. **Store listing assets** — app icon (512×512), feature graphic (1024×500), and at least two phone screenshots.
Once the checklist is complete, submit your production release for review! Google's review typically takes a few days for a first submission.